Camera Workshop 1; Focus, Sound and White Balance
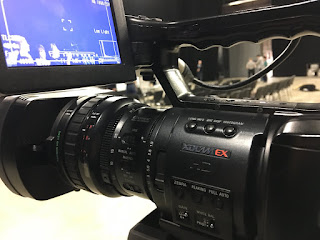
Today we went through the first camera workshop with Fergus and Sam in order to get a grasp for some of the Sony EX1R cameras and sound equipment we have available to us within the studio.
Acronym to remember when composing a shot:
SWEFF:
Sound
White Balance
Exposure
Focus
Framing
We were informed that we are now able to book kit out providing we fill in a health and safety form and sign over liability in order to cover any financial damages that may occur. (not that this would likely happen of course)
Due to my current situation in commuting between Crawley and Maidstone via train i'm not sure if booking kit out is entirely practical for me, therefore I may have to look into shooting my projects with another camera or perhaps even my iPhone. This is a bridge I will cross when I get to it.

Sound: We were fortunate enough to be able to play around with the boom microphones that are available within the studios, thus giving us a more industry-accurate representation of sound and the way it is captured during the large majority of productions. We were all able to have a go at holding the mic arm above a shot and listening/differentiating the significant increase in audio quality when switching from the traditional gun microphones mounted to the top of the cameras. Through attached headphones we were able to listen to the audio in realtime and adjust the audio gain on the fly in order to achieve the desired vocal effect.

Focus: Fergus wanted practicing focus and framing to be the main aspect of today's workshop, therefore this is what we spent the most time working on. I learnt how to adjust the focus to create a depth of field effect behind the subject I was looking at, this was done by utilising the enhanced focus button and matching the level of focus with the eyeline of the person in shot. We also practiced switching between focusing on a subject in the foreground and the background, this lead into some more advanced practicing of tracking a moving subject whilst maintaining an acceptable level of focus.
 White Balance: The last thing we covered in the workshop was adjusting the white balance in order to achieve consistent and colour-accurate skin-tones. This was achieved by holding a piece of white card up to the camera and using the white balance auto-adjustment button in order to set the camera kelvin level to the best that it could be in the location. This ensures that colours look natural rather than looking tinted either green or yellow. I found this incredibly easy to pick up and get used to as it was rather simple to begin with.
Acronym to remember when composing a shot:
SWEFF:
Sound
White Balance
Exposure
Focus
Framing
We were informed that we are now able to book kit out providing we fill in a health and safety form and sign over liability in order to cover any financial damages that may occur. (not that this would likely happen of course)
Due to my current situation in commuting between Crawley and Maidstone via train i'm not sure if booking kit out is entirely practical for me, therefore I may have to look into shooting my projects with another camera or perhaps even my iPhone. This is a bridge I will cross when I get to it.

Sound: We were fortunate enough to be able to play around with the boom microphones that are available within the studios, thus giving us a more industry-accurate representation of sound and the way it is captured during the large majority of productions. We were all able to have a go at holding the mic arm above a shot and listening/differentiating the significant increase in audio quality when switching from the traditional gun microphones mounted to the top of the cameras. Through attached headphones we were able to listen to the audio in realtime and adjust the audio gain on the fly in order to achieve the desired vocal effect.

Focus: Fergus wanted practicing focus and framing to be the main aspect of today's workshop, therefore this is what we spent the most time working on. I learnt how to adjust the focus to create a depth of field effect behind the subject I was looking at, this was done by utilising the enhanced focus button and matching the level of focus with the eyeline of the person in shot. We also practiced switching between focusing on a subject in the foreground and the background, this lead into some more advanced practicing of tracking a moving subject whilst maintaining an acceptable level of focus.
 White Balance: The last thing we covered in the workshop was adjusting the white balance in order to achieve consistent and colour-accurate skin-tones. This was achieved by holding a piece of white card up to the camera and using the white balance auto-adjustment button in order to set the camera kelvin level to the best that it could be in the location. This ensures that colours look natural rather than looking tinted either green or yellow. I found this incredibly easy to pick up and get used to as it was rather simple to begin with.


Comments
Post a Comment